Friday, May 25, 2012

Another 2012 Graduation Card

Hi Guys! I have one more graduation card to share. We have our last graduation to go to tomorrow night and I am told it is going to be very warm on Saturday. I'm hoping it will be cooler by the time we go as it is outside. This particular card was for last week's graduation party and I modeled it after the recipient, my niece. Paper Dolls are so fun to try and match to the person that you are giving the project to. I know that I haven't used all the different accessories on this cartridge. I am always finding new items for many projects. I normally use my Peachy Keen stamps for the face. That is what I get for being in a hurry as I forgot to hide the cut out. I actually think her face is really sweet even though I prefer the PK Stamps:)


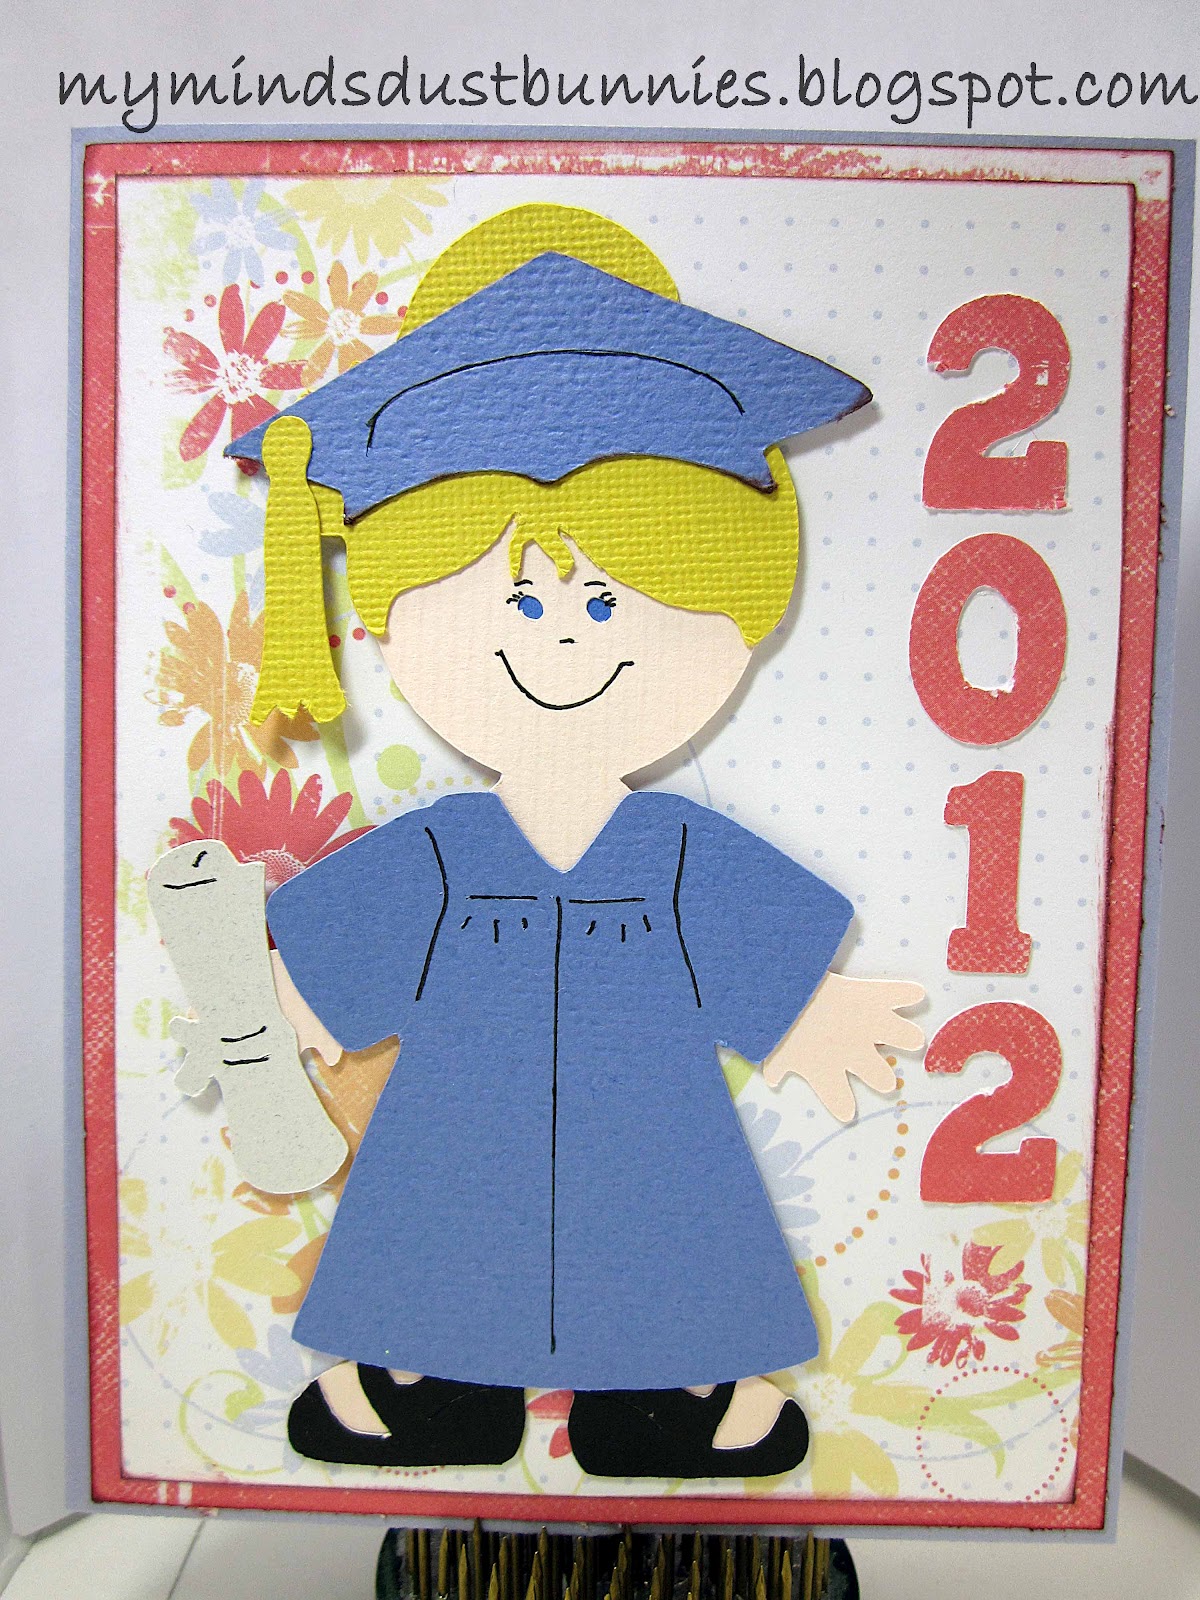
I added a piece of blue paper behind the eyes. I also added eyelashes and brows. Using a black micro pen I outlined her clothing, cap and diploma.

Recipe:
A2 card base
Scrap papers
Graduate - Everyday Paper Dolls 4.16" 
2012 - Birthday Bash 4" Black micro pen

Entering:
Fantabulous Cricut - Graduation Project
Celebrate the Occasion  - Graduation
Cricut Creative Cutter Room - Graduation
My Craft Spot - Congratulations


Thanks for stopping by and have a great Memorial weekend!

 Annette

Thursday, May 24, 2012

Exploring Cricut Daily Project

Hi Everyone! It's that time again to share with you a project for Exploring Cricut. The school year is finishing this week. Time has just flown way too fast. I'm sure many of you have last minute thank you cards that need to be made. My older daughter needed to write thank yous for presents from her birthday last week. I was able to whip this out fairly quickly using Everyday Pop Up Cards. I made a set of 8 for her to use and they took less than an hour. The longest part was drying of Stickles and Glossy Accents. I used Glossy accents on the teapot knob and the flowers. The Stickles was used for the center of the flowers.


I was able to get 8 teapots on a 12 x 12 sheet of paper at this size; using only 2 sheets. Using my Gypsy I manipulated the cut to fit adequately. I think, for me, making multiple cards of the same theme needs to be utilized more often. It would really save me time when I need a card in a hurry.

Recipe:
A2 card base
Papers - DCWV and American Craft
Teapot - Everyday Pop Up Cards 3"
Sentiment - TradeFish Designs
Diamond Stickles and Glossy Accents

Just a reminder Exploring Cricut has the "Cricut Choice" challenge that ends Saturday. Hope you can play along:)


Thanks for stopping by!

 Annette

Monday, May 21, 2012

Exploring Cricut Challenge - "Cricut Choice"

Good Morning! Thanks for stopping by today. We have a new challenge at Exploring Cricut and let me tell you it is a fun one. This challenge is your choice. Now remember, you have to use your Cricut. The cartridge is up to you. Grab a cartridge that you have not used or used very little and create a card, layout, or papercraft. There are lots of possibilities out there. Have fun with this one and really be creative!

For my projects, I decided to create a graduation card with matching envelope. I really like the Wild Card Cartridge but haven't really done much of the shape cards with the envelope. I will say that the Gypsy really helped me get the sizing down for this project. The graduation cap was added using Paper Dolls for Everyday.

I used the blackout feature for the owl in white so that I could attach the black dot for the eye and then I glued the red paper to the white. I also added a strip of black to the nose before gluing, the red and white cutout of owl, so that the nose wouldn't be white. This worked great so that none of that would show on the inside of the card. 


The liner is a separate piece that is a nice polished touch to your envelope. When cutting your pieces out for the envelope you will make them the same size as your envelope. I did leave the markers so that I could line up the tree trunk and the grass. I did, however, hide the markers on the envelope because I don't like how they sometimes tear the paper. 


Recipe:
Owl Card - Wild Card 4.72"
Graduation Cap - Paper Dolls for Everyday 6.05" (width)
Sentiment - Wild Card 3.88" (width)
Envelope -Wild Card 5.70"
Liner - Wild Card 5.70"
Black, Diamond Stickles, black ink

Remember, use any Cricut cartridge for your project that you haven't used much of. It is amazing the items on our carts that we aren't even aware of. You have until Saturday, May 26th to enter. I can't wait to see what you guys create:)

Thanks for stopping by!

 Annette

Thursday, May 17, 2012

Graduation Time!

Good Morning! Almost the weekend!! Anyone have graduations this year? I have nieces and nephews this year and I need to get busy. I have to say that this little guy is so fun. This is a stamp from The Cat's Pajamas and I pieced he and the balloon together. I have said in the past that piecing stamps are not always my friend; but I think this one came out pretty good:)  Hope you get some inspiration for your graduation cards from this.


Recipe:
A2 card base
Papers - Stampin' Up, Bazzill, Scraps
Bunny, balloon, sentiment - The Cat's Pajamas
Clouds - Create A Critter
Grass - Paper Doll Dress Up (I apologize I didn't write down the sizes for grass or clouds.)
Pop dots, black ink

Entering:
ABC DT Challenge Graduation or Wedding Card


Thanks for stopping by!

 Annette

Wednesday, May 16, 2012

Happy Birthday Little Lady!

Yesterday was my daughter's birthday and I made this card for her using Birthday Bash. She loves ladybugs and this one is super cute. The image showed the cut with a #4. I like that the number and present are not attached to the bug so that I could have her holding anything. I was going to weld together but decided to keep them all separate. 

I'm entering into Paper Playtime Challenge #74 Bug Card.


Recipe:
A2 card base
Ladybug - Birthday Bash 3"
#17 - Birthday Bash 1"
Present - Birthday Bash 1.90" (width)
Sentiment - My Creative Time


Thanks for stopping by!

 Annette

Thursday, May 10, 2012

Exploring Cricut Daily Challenge

Wow! This week is flying by and it is my turn to share at Exploring Cricut:) I pulled one of my very first cartridges out and decided to see what I hadn't done on it. I chose Stretch Your Imagination. This has awesome cuts on it for every season. I have never made the cards and decided to make some 3 x 3 summer cards. My oldest will be away this summer at a ballet intensive and I usually send a package a week to her.  So, I thought these would be great tucked into the package with her goodies:) I have mapped a few more out and need to get busy making those as she will be gone for a month.

I used my gypsy to map out the sizes for each image and card. I also hid the score marks on the card because I don't like how they tear when scoring.

One of the nice things about these cards is the image is already welded into the card base. I just added layers to the pieces on some of them to give them some depth. The white background is actually attached to the inside of the card, leaving the front as a window.


Diamond Stickles was added to this flower in the basket.


Firefly Stickles was added to the stem of the flower.


I used Stickles for the eyes and mouth of the catepillar.


Recipe:

3x3 card base (6" wide x 2.94 height)
Bicycle seat and pink body- Stretch Your Imagination 1.36"
Bicycle flower - Stretch Your Imagination 1.36"
Bicycle yellow pattern frame - Stretch Your Imagination 2.94"
Orange Flowerpot - Stretch Your Imagination 1.62"
Butterfly Frame - Stretch Your Imagination 2.87"
Catepillar Frame- Stretch Your Imagination 2.93"
Black Stickles, Firefly Stickles, Diamond Stickles, black ink

Don't forget you have until Saturday to enter our challenge of Mother's Day project. Looking forward to seeing what you create:)

Thanks for stopping by!

 Annette


Tuesday, May 8, 2012

Mother's Day

Hi! Hope all is well with everyone today. I wanted to share a cute card I made for Mother's Day with you. I used Birthday Bash. It seems to be my new go to lately. I really like orange and pink together. Reminds me of warm days. I left a sentiment off of this one because I couldn't decide which stamp to use, but I think I will put it in the upper left side once I make a decision.

I will say the faces on these were tricky. Even at the size that I did they were pretty small. I thought about leaving them off, but I was able to get them on with some patience:) I also added Glossy Accents to the eyes and nose. I think you can see the little one better in person.  Overall, I think it is a really sweet cut:)

Recipe:
A2 card base
Papers - Scraps
Kangaroos - Birthday Bash 4"
Brown pen, Glossy Accents

Entering:
2 Sisters Challenge - Anything Goes
Stuck On You Sketches - In Celebration of Mothers
More Than Favors - Mother's Day
The Pink Elephant Challenge - All About Mom
Fantabulous Cricut - Mother's Day


Thanks for stopping by!

 Annette


Monday, May 7, 2012

Exploring Cricut "Celebrate Mother's Day" Challenge

Good Morning! We have another challenge at Exploring Cricut. This is just in time for Mother's Day. Create  card, layout, or papercraft celebrating this event. I chose to create a card using Authentique papers.


Recipe:
A2 card base
Authentique and Stampin' Up papers
Creme Shape -  Martha Stewart Elegant Cake Art 3"
Stamped Paper Strip - Martha Stewart Elegant Cake Art 1.71"
"Mom" - Martha Stewart Elegant Cake Art 0.76"
Sentiment - My Pink Stamper

I hope you all decide to join in on the challenge. You have until Saturday, the 12th, to enter.


Thanks for stopping by!

 Annette

Friday, May 4, 2012

How 'Bout A Cool Drink!

Did anyone else have a Shabby blog scare the last couple of days? Well, I haven't been able to be on my blog lately due to family stuff and was really surprised when I went on and saw the dreaded malware. I ended up having to change my blog design and got rid of the old template. It definitely was a good reminder to back up my blog. I think I like this design better anyway.

Today, I made a slider card. If you haven't ever made one there are a lot of videos on YouTube that are very helpful to watch. I believe I learned how watching Robyn from My Pink Stamper way back when. This design has been around forever, but it is fun to make it your own on the front. I put the Crystal Lite individual drink packets together (I taped 4 together). 

The papers are Basic Grey and Bazzill. The straw was hand cut and the drink is from Paper Dolls for Everyday. The cut looked more like a sports bottle and I just cut the top of it off so it turned it into a glass. I don't have the book in front of me, but it was on the page with the tennis racket, etc. 

Don't forget that we have a new challenge at Exploring Cricut starting on Monday:)

Thanks for stopping by!

 Annette