Showing posts with label Martha Stewart Elegant Cake Art. Show all posts

Thursday, June 5, 2014

Exploring Cricut and More - Happy Birthday

Good Morning! Today I have a birthday card I am sharing at Exploring Cricut and More. I can never have enough of these on hand and I wanted a clean look for this one.


I used my Gypsy to help me size the scallops from Plantin for an A2 card. I really like the look of aqua and red together. A nice combo that could be used for a guy or girl. I layered the scallops to the card front adding a gem and ribbon for some texture.


The sentiment cut beautifully from Martha Stewart Elegant Cake. There are quite a few different fonts to choose from on this cartridge!

Recipe:
A2 card base
Papers - American Craft
Scallop - Plantin SchoolBook 4"
Happy Birthday Sentiment - Martha Stewart Elegant Cake Art 1"
Gems, Ribbon

Thanks for stopping by! Remember, you have until Saturday to enter the Father's Day challenge:)

Annette

Thursday, July 18, 2013

Exploring Cricut - So Blue

The blog hop is still going on for a chance to win a prize go here:)

The week has flown by and it is my day at Exploring Cricut. Around my house we are busy getting ready for college. I found this idea on Pinterest and thought it would be so fun to try with my Cricut.


I first painted the embroidery hoop that I got at Michael's with some acrylic paint. I sent this aside to dry, which was super quick, promise.


Here are the supplies I started with. If you decide to do this 3 was not enough for the floss and I had to run and get another one. I didn't split the floss thread as we wanted it to be as thick as possible. So, they were threaded as is.  I had some left over muslin that I cut down to size and placed in between the hoops. I adhered the flower with a little bit of tape runner as this was just to keep it in place.


Pay close attention to your flower pattern. I should have started on the inside instead of where my needle shows in this picture.  By sewing the middle section first this will allow your flower to have a cleaner finish for the end result. I then added some french knots to the middle and Stickles with buttons for some more sparkle. This is lightweight enough to go on her wall and the sparkle will hopefully catch the light:) 

Recipe: 
Flower - Martha Stewart Elegant Cake Art
Embroidery Hoop 10", Floss, Stickles, buttons

The Christmas challenge ends on Saturday and we sure hope you decide to join in the fun!! 

Thanks for stopping by!

Annette


Thursday, August 30, 2012

Exploring Cricut Project - Back to School 2012

Good morning! Glad you popped over today as it is my turn to share at Exploring Cricut. I have a 2 page layout of my girls on their first day of school. I used quite a few cartridges for this one and really had fun with the apple theme.


I used white on the eyes and then Glossy Accents over the entire eyeglass.

Recipe
12 x 12 2 page layout
Apples - Doodlecharms .95", 2.37"
Catepillar Create A Critter 2.46"
Face on catepillar - Peachy Keen Stamps
Border - Martha Stewart Elegant Cake Art 1" x 12.25"
Pink Tag - Tags, Bags, Boxes and More 3.29"
Rosettes - Ribbons and Rosettes 1"
Creme note - Storybook 2.08"
Sentiment - My Creative Time
Metal sentiment - Making Memories
Black and Diamond Stickles, Glossy Accents, ribbon, black ink, white pen

Thanks for stopping by and remember, the challenge ends Saturday, September 1st.

Annette

Monday, August 13, 2012

Exploring Cricut Challenge - "Cricut Choice"

Hi! Happy Monday! Today is a new challenge at Exploring Cricut. This is an Anything Goes Cricut challenge with a twist. You have to use 2 Cricut cuts and a monogram. Isn't that fun! I decided to create a pretty cover for the back of my cell phone.


This was super simple. First, I picked out my papers and layed the cuts out on my Gypsy. I then laid the patterned paper face down and the phone cover down on top of it to trace an outline. I also traced two holes where the camera and speaker are. Removing the cover, I used an X-acto knife to cut the patterned paper.

I then used Mod Podge to adhere the papers to the phone. I also went over the top of the papers with the Mod Podge. The flower has Stickles in the center of it.

So there you have it! An inexpensive way to jazz up your phone. Hope you enjoyed  this and maybe it inspired you to cover your phone too:)

Recipe:
Papers - Basic Grey, Bazzill
Monogram - Lyrical Letters 1.76"
Banner  - Lyrical Letters .79"
Flower - Martha Stewart Elegant Cake Art .90"
Mod Podge, Diamond Stickles

Okay, now it is your turn! You have until Saturday evening to enter your project. Don't forget to use your Cricut:) For more inspiration, check out my DT sisters and brother too!!


Thanks for stopping by!

Annette


Monday, May 7, 2012

Exploring Cricut "Celebrate Mother's Day" Challenge

Good Morning! We have another challenge at Exploring Cricut. This is just in time for Mother's Day. Create  card, layout, or papercraft celebrating this event. I chose to create a card using Authentique papers.


Recipe:
A2 card base
Authentique and Stampin' Up papers
Creme Shape -  Martha Stewart Elegant Cake Art 3"
Stamped Paper Strip - Martha Stewart Elegant Cake Art 1.71"
"Mom" - Martha Stewart Elegant Cake Art 0.76"
Sentiment - My Pink Stamper

I hope you all decide to join in on the challenge. You have until Saturday, the 12th, to enter.


Thanks for stopping by!

 Annette

Wednesday, March 7, 2012

For The Birds

Hi Everyone! Today I have a cute little bird to share with you from Create A Critter and Martha Stewart Elegant Cake Art. I found these cute colored googley eyes at Hobby Lobby. They are really fun to use and the eye comes in different colors. This was a fast one to put together and so bright and cheery.


Recipe:
A2 card base
Papers - DCWV, K&Co., scraps
Bird - Create A Critter 3.82"
Scallop Border - Martha Stewart Elegant Cake Art 2.50"
Sentiment - My Creative Time
Liquid Pearls Platinum
Googley eyes - Hobby Lobby

Entering:


Thanks for stopping by!

Annette

Friday, January 13, 2012

Valentine With Love!

Happy Friday Everyone! This is going to be a busy weekend around my house and I am hoping to be able to squeeze crafting in:)

Today I wanted to share a Valentine card that I made using the sketch from More than Favors. This was a fun one to do, but also a little tricky as the sketch is actually for a layout. I'm not sure about sizing, but I do really like the papers and especially the ruffle from Tim Holtz.


Recipe:
A2 size card
Papers - Authentique
Heart - Martha Stewart Elegant Cake Art 2.65"
Top Note - Elegant Edges 3.12"
Ribbon - Tim Holtz
Sentiment - Michaels
Crimper, Fiskars Punch

Entering:
More Than Favors Sketch Challenge #62
Hand Stamped Sentiments - Pleats or Ruffles Challenge #100

Thank you for stopping by!
Annette


Sunday, November 13, 2011

Guest Designer for Exploring Cricut

Hi Everyone! I am so excited to be a guest designer at Exploring Cricut today. Thank you so much Diane for inviting me! I am busy working on Thanksgiving items and have been wanting to try a banner for sometime. I needed to dress my mantle for Thanksgiving and thought this would be perfect.  I used quite a few carts to get this one done.

I used papers from 2 DCWV stacks; Autumn Splendor and Harvest Gathering.  The papers have glitter, foil and a nice shene to them. I started with laying the design out on my Gypsy. I cut the base from Twinkle Toes at a height of 7.39". The letters were from the cartridge Gypsy Font cut at 4.08".  I used the layer feature as well so that the letters would have the nice flourish behind them. The rosettes were made with the Martha Stewart Elegant Cake Art cut at 1.5" with a width of 12". I used 2 of these together to make sure that the diameter would be big enough behind the letter. I also cut a circle at 2.23" in height for the rosette.


The acorns were cut using Create A Critter at 7.15". The leaves were cut at 3" using Doodlecharms. I used Argyle and Paisley embossing folders from Cuttlebug.


The tulle was a great buy at Joann Fabrics; 25 yards for about $2.99 even less expensive with a 40% coupon. It is a rich chocolate brown.

To make the rosettes I used my Martha Stewart scoreboard. I scored them at 1/4" all the way down. I did use two 1.5" x 12" borders together to get the dimension I wanted. I used 3M glue them to put the 2 pieces together, but hot glue was used to attach the circle to them. The tricky part of rosettes is scrunching and holding to get the hot glue and circle secure. There are quite a few videos out on youtube that show great tutorials on exactly how to make them. The nice thing when making your own is being able to customize what you want the strip to look like. I wanted to have a decorative edge so I chose one with a scallop and hole punch. I think they are all so pretty; even the plain edge.

Thank you for stopping by today and I hope that I have inspired you to make a banner for your home:)

Annette

Friday, October 14, 2011

Merry Christmas Penguins

I'm am so excited that I get to play with my PK Critter Stamps. I had been wanting them for awhile and couldn't decide what size and I finally just picked. I also got a monster set and just love the look they give to the cuts.

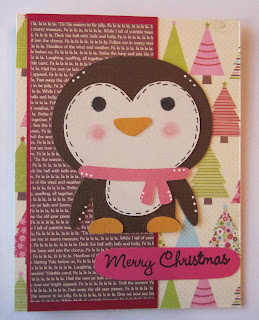
I am entering this card in the Peachy Keen Sketch Challenge #62. I flipped the sketch around as I didn't realize how big this guy's head would be and I really wanted to use the penguin paper:) I put brown stickles on top of clear skittles to get the glittery dots. I also have a new paperstack (6 x 6) from Jillybean that has really cute Christmas/Holiday papers. I really need to get on the ball with Christmas cards. This definitely is a start.


This was the first penguin I cut and realized that he was way to big for my stamps. I was so excited to play with my stamps that I didn't check the sizes on the cheatsheet that I have. Oh well, got another card done:)


Recipe:
A2 card base Stampin' Up
Pattern Papers - Jillybean Soup Christmas Eve Chowder
Penguin - Create a Critter 2 1/2 ", 3 1/4"
Border - Martha Stewart Elegant Cake Art 0.66"
Peachy Keen Critter Faces
Sentiment - My Creative Time
Stickles, Skittles, White Signo Uniball Pen, Chalk

Thanks for stopping by:)

Annette

Thursday, September 29, 2011

Dance The Night Away!

I saw this sketch over at Blog Quick Quotes Friday Challenge #4 and decided it would be perfect for last years Father/Daughter Dance. The dance has a theme every year, and this paticular year was "famous pairs". They went as Bo Peep and Woody from Toy Story. Since their outfits weren't color coordinating I chose to go more with Po Beep's pink. I usually journal with the computer and not my own handwriting, wish I would have done that this time. Oh, well. I do like the design of the page. There were quite a few pictures and I chose only a few and will put the rest in those great sleeves that will fit 6 back to back (total 12) and slide in behind this page in the album. I used to think that all of them had to be scrapped, but really it is whatever you are comfortable with:) The sleeves can be decorated too. The flowers have a really nice shimmer in person that compliments the bits of glitter on the paper.


The flowers were from George and Basic Shapes. I started with a pink paper and then spritzed them
Perfect Pearls Spun Sugar.  I mixed water and the Perfect Pearls Powder together.

Mister used to spray flowers. You have to shake them really well
before using to get all the powder out from the bottom before spraying.

Recipe:

Layout from Blog Quick Quotes Challenge #4
Papers - DCWV Garden Party
Flowers - George and Basic Shapes 1", 1.25", 1.50", 1.75"
Font - Gypsy Font 1"
Border - Martha Stewart Elegant Cake Art height 2"


Thanks for stopping by:)
Annette

Tuesday, September 20, 2011

Fall

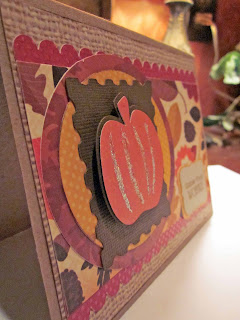
This is a card that I made for a few challenges.  I inked the edges lightly with brown. For the circles and frame for sentiment, I grouped each pair and then resized one of them to make a shadow. I also used a pop dot for the pumpkin to give it more dimension. I am liking this new stack from DCWV. I like that it has dimension on the papers and some glitter too;).


Recipe:

A2 size kraft cardstock
Pumpkin - Gypsy Wanderings1.80"
Circles - Create A Critter Smaller Circle 3.32", Large Circle 3.86"
Stamp Frame - Create A Critter 2.44"
Sentiment Frame - Create A Critter Smaller 1.09", Larger 1.19"
Scallop - Martha Stewart Elegant Cake Art 0.62"
Leaf Paper - Size 2 3/4" x 5"
Woven Mat - 4" x 5 1/4"
Sentiment - My Creative Time
Papers DCWV Harvest Gathering
Diamond Stickles

Entering
Cute Card Thursday Challenge 182 Anything Goes

My Craft Spot Challenge 26 Fall Leaves

Crafty Sprouts Get Sketchy With It

The Scrap Master Color Combo


Thanks for looking:)

Annette

Sunday, September 4, 2011

Bring on the Cooler Weather!!

I am starting to get really excited for fall. The weather has finally broken here today and it is gorgeous and sunny at about 69 degrees. It is so pleasant! Makes me think of football, yummy soups, pumpkins, hayrides. So, with that in mind, I decided to play today with Celebrate the Occassion (Challenge #28). I haven't played much with this cart and am excited to give it a go. I have some halloween pages to scrapbook and am planning on using this cart as well as Mini Monsters. I really need to get busy with my pages:)

I think she is really fun and spooky looking at the same time. It was tricky because she was pretty tiny. Overall she went together pretty easy. I would say the eyes were a little difficult. I had laid her out on my gypsy and almost missed a layer. I love my gypsy but sometimes when I am working with unfamiliar carts I still pull my books out to make sure I don't foget anything.  I wanted the stamp to be subtle so I didn't press really hard.

Recipe:
Bride of Frankenstein - height 2.22 " Happy Hauntings, Gypsy Cricut
Frame - height 2.88" Create a Critter
Papers - Blue and green  - Bazzill scraps, pattern (sorry don't remember as it is also a scrap),
Kraft base - American Crafts
Stamp - Small Talk My Creative Time
Scallop - Martha Stewart Elegant Cake Art
Stickles - Xmas Red
Ribbon - Making Memories

Thanks for stopping by. Come back soon:)

Annette

Sunday, August 28, 2011

Window Card

I always thought the window cards were really difficult to make and was to scared to attempt. Well, Sheila at shesasassylady.blogspot.com changed my mind. She has tutorials with the gypsy that go step by step. She is fabulous. Thank you Sheila:) Anyway, I created these 2 cards this week. My Dad broke his hip in July and he is working very hard at rehab. Not an easy road, but he definitely shows improvement. Cards are always a nice way to let someone know that you care. The other card was for my daughter. She received a scholarship this past summer for dance. She thought it would be nice after the meet and greet to tell them thank you again. What a good girl:)

Before I get to the cards, I just want to say that many prayers are coming your way if you are in the way of Hurricane Irene. I hope that everyone is safe and sound and she loses her energy.

The card is an A2 size. I used DCWV Dots, Stripes and Plaids for this card. This is a great stack if you are looking for some good male papers. I always have a harder time with those because I want to put some bling or something:) I used Gypsy Wanderings for the base and Lyrical Letters for the sentiment.
This is also an A2 with the papers from DCWV Citrus. The butterfly is MS Elegant Cake Art. I stickled the top layer of the butterfly and only adhered the middle of the body so that the wings pop up. It's a little hard to tell from the picture but in person you can really see the different colors underneath the top layer. The sentiment is from Gypsy Wanderings.

Thanks for looking and I hope everyone has a safe Sunday. Thanks, again, to Sheila for her wonderful tutorials.

Annette

Thursday, August 25, 2011

Cards For A Cause

The kids are back in school and I am on a mission to clean up my stash. I decided to check on some of my favorite blogs and saw that Robyn at mypinkstamper.com has a request. A nurse in WI is requesting 1500 cards for a breakfast to sponsor breast cancer survivors or people who are currently dealing with it. She wants a card placed on each woman's chair. I think that is such a great and moving idea. I can't think of a better way for my first project to share:)


Here is the address from mypinkstamper.com if anyone else would like to help:


Kathy Mortl
10261 N Sunnycrest Drive
Mequon, WI  53092