Showing posts with label Thank You. Show all posts

Thursday, January 30, 2014

Exploring Cricut -

Good Morning! It's almost Friday and it is time once again to share with you at Exploring Cricut. My stash of thank you cards has definitely dwindled and I needed to make quite a few so I thought I would share a simple and quick one with you.


I popped the flower negative up with pop dots in the four corners and made it 1/4" smaller than the light purple paper. I chose to create a decorative pin by using a straight pin and a button. I attached them together using Glue Dots and then the ribbon on top. 

Recipe:
A2 card base
Stampin' Up Papers
Flower - Cindy Loo
Banner - Cindy Loo
"Thank You" Sentiment - Hero Arts
"So Much" - Tradefish Designs
Ribbon, Pin, Black Ink

Thank you for stopping by and remember you have until Saturday to enter our Cricut Choice challenge and take our survey! We hope you join in. Stay warm and toasty and if your somewhere sunny with a beach, I'm so jealous!!!:)

Annette


Thursday, January 16, 2014

Exploring Cricut - Pink Birdie

Hello! How has your week been going? I think I am finally getting over this walking pneumonia. Geez, it lasts a long time. Hope you all are staying warm and healthy! I am sharing today at Exploring Cricut and I have a sweet thank you from a very cute pink birdie. 

Even though I use my Gypsy or CCR to create I still browse through my books I have stored alphabetically in photo boxes. It really helps when making sure you are getting all the layers needed or you would just like to see the images in multicolors. Books can also be stored on Ipads, Iphones, Nook etc. so they are really at your fingertips. At the cricut.com website there are digital pdf files of each book that can be downloaded to your devices.


So, I came across this sweet birdcage from Straight from the Nest but really wanted a stand too. 

Click to view full size image

I then went to my Gypsy search and typed in birdcage and came up with quite a few to choose from and decided on this one from 3 Birds on Parade.

Click to view full size image

Using my Gypsy, I flipped the Straight From the Nest bird to face the other direction and then cut the birdcage off of 3 Birds on Parade so that I could use the more decorative one. I joined the cage and stand together with a pink brad. 

Recipe:
A2 card base
Bird stand - 3 Birds on Parade 
Bird Cage and Bird - Straight from the Nest
Bird Cage - BoBunny Polka Dot Paper
Patterned Papers - My Mind's Eye
Ribbon, Diamond Stickles

Thanks for stopping by and don't forget to add your creation to our Winter Wonderland Challenge!

Annette

Thursday, January 2, 2014

Exploring Cricut - Double Thank Yous

Happy New Year Everyone! Time to share at Exploring Cricut and I have a couple fun cards for you today. I created 2 cards with the same cut and what a time saver when sending all those holiday thank yous. 


I attached the tag to the paper and then adhered the clip with a glue dot on top of the tag. 


Be sure when using negatives you get all the extra pieces that aren't attached so you can glue them in as well. Luckily, for this word, I only needed the small triangle for the "a". The kraft hearts were stamped and then cut out free hand.

Recipe: 
A2 card base
Thanks - Cricut Craft Room .88"
Heart Stamp - 
Gems, confetti heart and sequins, twine, tag, clip

Thank you for stopping by!

Annette


Monday, April 22, 2013

Exploring Cricut - April Showers Bring May Flowers

Hello! It's Monday and you know what that means; Exploring Cricut has a new challenge today. You are to create a card, layout or project including a flower with your Cricut. We had a beautiful weekend here and my husband just informed me that it might rain and snow tonight and tomorrow. Really? I for one am ready for warmer weather. I hope the weatherman is wrong. 

When I created this card I was thinking of warm sunny days and picnics. I guess I will have to keep thinking about them for awhile:)


Recipe:
A2 card base Kraft paper
Red Gingham Mat Plantin SchoolBook 4.55"
Blue Scallop Mat - Elegant Edges 3"
"Thank You" - Gypsy Wanderings 2.81" (width)
Flowers - Walk In My Garden .97"
Ribbon, Black ink, Yellow Stickles, Clear gems

Hope you decide to join in! Check out my DT sisters for great inspiration:) Winners will be drawn this Saturday.

Thanks for stopping by!

Annette

Friday, March 22, 2013

Sketchy Friday #12

It's time for a new sketch at Sketchy Friday and once again Sonia has an fantastic one for inspiration!


I chose this darling SKdigis fish. Isn't she happy and of course, she needed some sparkle. What would we do without Stickles?? I used a yellow and blue to give her some pizzazz. I used Silhouette Design Edition to color in my fishy and her bubbles. 

Recipe:
A2 card base
Papers - Scraps
Fishy - SKdigis
Sentiment - SP & Company
Stickles, ribbon


Now, it is your turn to great creative!! Go check out my DT sisters for more awesome ideas! Hope you all have a great day:)

Annette

Friday, March 8, 2013

Sketchy Friday #10 - This Bud's For You

Hello! Glad you stopped by as today is Sketchy Friday and a new sketch to play with. I'm so glad it is Friday as it has been busy, busy at our house. We are doing some DIY projects and getting ready for our new puppy. It was great to get into my craft room and play with Bo the Dragonfly.


I colored him with my Silhouette and of course used Stickles to give him that extra shine. Isn't he darling? You can get him over at the SKdigis Shop. The sentiment is also an SKdigis.


Here is the sketch for this week. Remember, you have until Thursday to enter your project and I hope you decide to join in the fun. Have a great weekend!!

Recipe
A2 cardbase
Bo the Dragonfly - SKdigis
Diamond and Thistle Stickles
Scallop Punch, Gems, Ribbon

Thanks for stopping by!

Annette

Friday, February 8, 2013

Sketchy Friday Challenge #6

It's Sketchy Friday Challenge day and we are already to #6!! I decided to create a thank you card and used  home sweet home. Isn't this mushroom house sooo cute! I really had fun working on this one and of course, I enjoy the bright colors. 

All of the coloring, except the grass was done with the Silhouette Cameo software. When choosing these colors I was definitely in the spring mode and thinking of little fairies and leprechauns:) Hope you decide to join in the fun and don't forget to check out my DT sisters for more wonderful inspiration!


Recipe:
A2 card base
Mushroom House - SKdigis "Home Sweet Home"
Sentiment - Hero Arts
Rhinestones, Copic Marker (green grass), ribbon, pink ink

Thanks for stopping by!

Annette


Monday, January 28, 2013

Exploring Cricut - 1,2,3!

Hello! Happy Monday to you all. It is an Exploring Cricut challenge week. The challenge is to create a card, layout or project with 1 embellishment, 2 patterned papers and 3 Cricut cuts

I needed some thank yous for my birthday a couple weeks ago so I decided to create a gate fold. I knew I wanted to use Straight From the Nest for my main image. I rarely use the sample cards in the front of the books, but really liked this style. So, I scaled it down to fit into an A2 envelope and created this one.


I am really pleased at how well my Cricut cut the intricate parts. I would suggest a fairly sticky mat and a newer blade when cutting pieces that have a lot of small items. I think the slider is a different addition on a card and hope to use it again soon.

The pattern papers are subtle, but you can click on the picture to make it larger and see the patterns a little better. I laid my cards out on my Gypsy and they were done very quickly:)

Recipe:
A2 cardbase
Papers - DCWV Garden Party and Bazzill
Slider - Straight From the Nest 1.43"
Sentiment - Cindy Loo 1"
Corner Decorations- Straight From the Nest 1.24"

Thanks for stopping by and hope you decide to join in the fun at Exploring Cricut this week.

Annette

Thursday, December 20, 2012

Exploring Cricut - Tweet You

Hello! It is my turn today at Exploring Cricut and I have a thank you card to share with you. It is always helpful to have these done before the holiday. This is the image that my 7th grader chose this year and will be very easy to mass produce.


3 Bird images are very easy to layer and are so darn cute. I added some Stickles to the present. I also used a pen to add some stitching to the white layer. My white gel pen decided to run out; but no worries as Liquid Pearls was used for the large and small dots. 

Recipe:
A2 card base
Bird - 3 Birds On Parade 3"
Papers - DCWV and Bazzill
Sentiment - K Andrew Designs
Liquid Pearls, Xmas Stickles, Ribbon, black micro pen

Thanks for stopping by and enjoy your day:)

Annette

Wednesday, September 26, 2012

In Everything Give Thanks!

Hi! I was cleaning my craft room and came across this image that I had made years ago and never created a finished project with it. I think this rose is so pretty. I believe that it was from a Stampin' Up stamp. I had gone to a class and played with this beautiful image. It was then colored with pastels and chalk. We then added a glaze over it to give it the shimmer. I remember adding multiple layers. This product is different than Glossy Accents because it does not make the image raised, just gives it a nice glass look.


Have you cleaned your room lately? You might find a surprise like I did:)

Recipe:
A2 card base
Rose - Stampin Up
Sentiment - K. Andrew Designs
Ribbon, Tea Dye Ink Tim Holtz, Pastels and chalk, Cuddlebug embossing folder

Thanks for stopping by! Check back tomorrow as it is my day at Exploring Cricut.

Annette


Monday, September 24, 2012

Exploring Cricut Challenge - "Trains, Planes and Automobiles"


Good Morning! So glad you came by because it is time for another challenge at Exploring Cricut. I think this is a really fun one and hope you join in. Create a card, layout, or paper craft with a cricut cutout of some means of transportation.


I decided to create a thank you card using this cute little beetle bug from Paper Dolls for Everyday. I used vellum to cover the windows. The sentiment is attached with wire to look like an antenna at the back of the card. 


Recipe:
A2 card base
Car - Paper Dolls for Everyday 3.24"
Road - Paper Dolls for Everyday 2.18"
Sentiment - K. Andrews Designs, TradeFish Designs
Liquid Pearls, black ink, brads, wire

Thanks for stopping by and looking forward to seeing your projects!

Annette

Tuesday, August 21, 2012

Snappy Thanks!

Looking for the My Memories Giveaway go here

Good Morning! Hope everyone is off to a great start today. I have a cute little critter to share with you today. My stash of cards is low on thank yous and I thought I better get busy. 


I didn't have the right saying so I took 2 different stamps and created the sentiment that I wanted by masking. I actually like that they are not the same font:)

Recipe:
A2 card base
Papers - Basic Grey
Turtle - Create A Critter
Sentiment - My Pink Stamper for the "Snappy", Stampin' Up for the "Thanks"
Scallop Circle - Studio G
 Black Ink, Ribbons

Entering:
Craft Your Days Away  Challenge #52 Anything Goes
Hiding in My Craft Room Challenge #59 Limited Layers


Thanks for stopping by and have a great day!!

Annette


Friday, August 17, 2012

Summer Buggy Thanks!

Happy Friday!! Are you all ready for the weekend and by the way where has August gone? My kids started school yesterday and they seem to be off to a great start. Today, I have a thank you card with another SKdigis image to share. This is a freebie over at Sonia's site for you to try. Her images are cute, cute and fun to work with!!


Recipe:
A2 cardbase
Papers - Scraps, DCWV
Bug Image -SKdigis
Creme Mat - Elegant Edges 3"
Firefly and Thistle Stickles, black ink, Copic markers

Entering:
DL Art - Friends
365 Cards - Super Sketchy Sunday
Anything Challenge - Summer Days
Hiding In My Craft Room Super Scraps
The Cricut Chirp - Anything Goes

Thanks for stopping by and have a great weekend!!

Annette

Thursday, May 24, 2012

Exploring Cricut Daily Project

Hi Everyone! It's that time again to share with you a project for Exploring Cricut. The school year is finishing this week. Time has just flown way too fast. I'm sure many of you have last minute thank you cards that need to be made. My older daughter needed to write thank yous for presents from her birthday last week. I was able to whip this out fairly quickly using Everyday Pop Up Cards. I made a set of 8 for her to use and they took less than an hour. The longest part was drying of Stickles and Glossy Accents. I used Glossy accents on the teapot knob and the flowers. The Stickles was used for the center of the flowers.


I was able to get 8 teapots on a 12 x 12 sheet of paper at this size; using only 2 sheets. Using my Gypsy I manipulated the cut to fit adequately. I think, for me, making multiple cards of the same theme needs to be utilized more often. It would really save me time when I need a card in a hurry.

Recipe:
A2 card base
Papers - DCWV and American Craft
Teapot - Everyday Pop Up Cards 3"
Sentiment - TradeFish Designs
Diamond Stickles and Glossy Accents

Just a reminder Exploring Cricut has the "Cricut Choice" challenge that ends Saturday. Hope you can play along:)


Thanks for stopping by!

 Annette

Friday, March 2, 2012

How About A Color Challenge!

Good Morning! Where did this week go! It won't be long before Spring Break is here and then not much more before school is out. Feels like we just started. I guess times does fly as you get older. I think it needs to slow down a little so I can catch up:)

Today I am sharing a card that I created using mainly Paisley. Have you ever bought a cartridge for a particular cut, but when you get the cart it's not the first cut that you use? Well, that was Paisley for me. I bought the cartridge because of the cute dolls. After all this time, I am finally using this sweet doll. As I have said in previous posts, this is one of my favorite cartridges. I am really pleased with how she came out and hope you like her too.


I used sequins and gems on the doll. I didn't have a purple gem so I put Stickles on a clear gem and it worked perfectly on the tag.


Inside of card

Recipe:
A2 card base
Papers - DCWV, Bazzill, K&Co., scraps
Doll - Paisley 3.08"
Flag Banner - Everyday Pop Up Cards 1.05"
Tags - Tags, Bags, Boxes and More
Inside Flower - Paisley 2.68"
Sentiment - Tradefish Designs
Turquoise, Firefly, Lavender, Diamond Stickles
Recollections gem, pop dots, black pen, sequins, Prima flower

Entering:

Fantabulous Cricut Challenge #100 purple, turquoise, green
Party Time Tuesdays Anything Goes
Top Tip Tuesday Real or Faux Stitches
Make It Monday Anything Goes
Joyful Stamper - Inspire Me Friday - Anything Goes


Thanks for stopping by!

Annette


Tuesday, January 24, 2012

Burst of Color!

I love the color pink! To me it is like black or brown because it can go with so many different colors. I created this card and played around with dimensions for the flower. It was a lot of fun to make because, again, I kept adding things. I don't always do that as I am more of a CAS gal, but I do like the look. Hope you do too:)


Recipe:
A2 card base
Flower - Forever Young base 3.25", 2.65"; flower 3.25", 3.08", 3.00", 2.65" 
Border - Fiskars punch
Papers - Stampin' Up, K & Co.
Stickles Diamond
Hemp, button

Entering:
Bitten By the Bug 2 - Dimensional flower
Die Cuttin Divas - Button, bow and/or bling


Thanks for stopping by!
Annette

Tuesday, January 3, 2012

Don't Forget A Holiday Thank You

Good Morning Everyone! The holidays came and went in a hurry didn't they. My girls have today off and will return to school tomorrow. I love when they have breaks and we can all just slow down the pace a little. Tomorrow will definitely be back to business as usual. However, there is one order of business that couldn't be dismissed and that was the Christmas thank yous. It is always fun to see what designs they decide upon. This year was no different. Each girl chose what they wanted their card to be and I am happy to say they are done and in the mail.


I used a homemade wobble from a gift I won at Melody Lane Designs. It works great and so easy to make.


Recipe:
A2 Size Cards
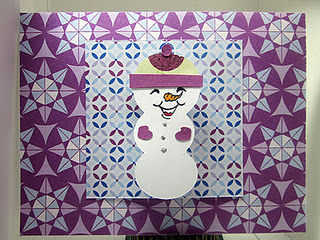
Reindeer Winter Frolic 2,52"
Snowman - Winter Frolic 2.68", Peachy Keen Stamps
Papers - DCWV and scraps
Stickles - Red, Green, Silver
Orange and red markers

Entering:
She's A Sassy Lady Thank you cards
Paper Playtime Challenge #64 Something recycled
Jaihart: Sit Back, Relax and Look at all the Loveliness Projects your working on
Pink Cricut 1st link up what have you been up to


Thank you for stopping by!
Annette

Tuesday, December 20, 2011

Sweet Dragonfly

Hi Guys! I'm taking a break from wrapping and wanted to play in the M.A.G. Challenge #56 using page 26 from the Paisley cartridge. This is one of my favorite cartridges. This little dragonfly is just so sweet I couldn't resist taking time to make her. My logic is were going to need thank you cards after the holidays. Right? Well, I know I need to get back to wrapping:)


You might notice the wings are raised up a bit. There are a couple pop dots underneath. I used silver vellum and added stickles which then helped give the wings a little dimension.


Recipe:
A2 size card
Dragonfly - Paisley 3.91"
Sentiment - My Creative Time
Face - PK Stamps Happy Lashes
Ribbon, papers - Stash
Stickles  silver

Thank you for stopping by!
Annette

Wednesday, December 7, 2011

Thank You Note Cards

Hi All! I made a few cards and wanted to share with you one that I found in the magazine Paper Crafts. I recreated it using various cartridges and just loved the look of it. I used my template in gypsy to make sure that it would fit the front of a 4 1/2" x 5" card.


I also decided to use the cut outs on other cards. I love when I can use everything up:) I was in a hurry, but I think I should have either hid the center flower marks or cut another flower on top to give it a cleaner look.


Recipe:

danke - Lyrical Letters 1" (welded together)
merci - Create a Critter 1"
gracias - Gypsy Font 1" (welded together)
thanks - Opposites Attract 1"
flower - Forever Young 1 1/2"
Stickles, Perfect Pearls, pop dots
Thanks for stopping!

Annette

Monday, November 21, 2011

Sweet Thanks

Good Morning! Hope everyone is getting ready for turkey day. It is fast approaching. I have a quick thank you card that I made using gel pens with my cricut. I really need to use them more often. They are so pretty. These were from Cri-Kits and they are the glittery ones. It is hard to tell in the pic, but this is the black glitter pen. I also used Basic Grey and Bazzill for my papers. A little bit of blue stickles for the bird and a fiskars punch finished it.


Entering:
Fantabulous Cricut Challenge #87
Getty Cricky Give Thanks

Thanks for stopping by!

Annette