Showing posts with label Valentine. Show all posts

Thursday, February 13, 2014

Exploring Cricut - Love Bug

Hello, today is my turn to share a project at Exploring Cricut! Are you ready for Valentine's Day tomorrow?  Well, if not  there's still time:)I created this sweet love bug card to send to my oldest with some yummy treats. 


I really am enjoying using this paper stack from Doodlebug. I added Fruit Punch Stickles to the cheeks and Black Stickles to the mouth and eyes.

Recipe:
A2 cardbase
Doodlebug Papers
Love Bug - Simply Charmed
Sentiment - Hero Arts
Twine, Stickles

You have until Saturday to enter your Valentine project at Exploring Cricut. Remember, to check out the  hop  for a chance to win some blog candy!!

Thanks for stopping by!

Annette


Monday, February 10, 2014

Exploring Cricut - Valentine Blog Hop

Hello Monday and welcome to Exploring Cricut Valentine Blog Hop!! If you hopped from Emily then you are in the right spot. If not, hop back to Exploring Cricut so you don't miss a thing:) You can join in the fun by creating a card, layout or paper craft using 1 jewel celebrating Valentine's Day.  Our Design Team has some awesome projects for inspiration  You have until Saturday to enter our challenge:)

I created a card using the fun double sided papers from Doodlebug.

I created the shadow feature in white and popped the pink pattern paper up with pop dots. My jewel is tucked in between the heart that she is holding. 
Recipe:
A2 cardbase
Papers - Doodlebug
Girl Silhouette - A Child's Year
Jewel

There is blog candy to win too! To win: Let me know you are a follower and how to get a hold of you in the comments below. I will draw a winner Saturday. Good luck!!


Here's the schedule if you get lost along the way!


Now hop on over to Michelle for some more crafty goodness!!

Thanks for stopping by:)

Annette


Thursday, February 14, 2013

Exploring Cricut - XO Kisses

Happy Valentine's Day! I'm sharing over at Exploring Cricut today. If you need a last minute card this one is a quicky. As you may know Paisley is one of my all time favorite Cricut cartridges. It has been neglected for awhile so I decided to dust it off and see what image I could play with.


There was a cherry on the lipstick bottom that I hid with my Gypsy. I added Glossy Accents to the lighter part of the pink lipstick.

Recipe:
A2 cardbase
Papers - Scraps and Basic Grey
Lipstick - Paisley 1.97"
Border - Elegant Edges 0.60"
Mats - Plantin SchoolBook 3.15" and 2.79"
Ribbon, Glossy Accents

Thanks for stopping by!

Annette


Monday, February 11, 2013

Exploring Cricut Challenge - Valentine's

It's Monday and time for Exploring Cricut's Challenge! Are you all ready for Valentine's Day this Thursday? Well, maybe we can inspire you on those last minute creations. The challenge is to create a card, layout or craft with Valentine's Day as your theme. 


I created this tag to attach to a present. Isn't this piggy a sweetie pie!! This will look great on the package. Create A Critter is so easy to put together. 

Recipe:
Tag - Tags, Bags, Boxes and More
Pig - Create A Critter 2.65"
Heart - SP&Co.
Sentiment - SP&Co.
Stickles, Copic, Ribbon

Thanks for stopping by and hope you have a great day!

Annette


Friday, January 11, 2013

Sketchy Friday #2

Hi Everyone! Happy Friday! Today is Sketchy Friday Challenge #2 at SKdigis. I love working with sketches; just takes all the guess work out. You can use any image of your choice as long as you follow the sketch. Be sure to check out all the details at SFC as well as all my design sisters' creations. They are awesome!


Here is the sketch for this week. I decided to use this sweet piggy (Piggy Holding Lips).


I used pop dots to give her some dimension. I also used some embroidery floss for the tail; just tying some loose knots to give it a little more character.


The edges of both circles  and floral rectangle were inked in black. I used my Silhouette to color/shade the image and then cut out with my machine. The patterns for the lips and hooves were made using the machine too.This machine makes this so much easier. I'm still getting the hang of it, but really enjoying what it can do.

Recipe:
A2 card base
Heart and Floral Paper - K & Co.
Green glitter circle - DCWV Paper
Pig With Lips - SKdigi
Sentiment - My Creative Time
Floss, Ribbon, black ink, corner rounder

I'm so glad you stopped by and hope that you decide to join in the fun. Have a great weekend:)

Annette


Tuesday, February 14, 2012

Happy Valentine's Day

Hi Guys! Hope your day is super sweet for Valentine's. I'm sharing a card today that is definitely CAS and no Cricut. I painted chipboard red and used my own handwriting for the sentiment. I did use black ink on the edges.

Enjoy your day today with friends and family:)


Thanks for stopping by!

Annette

Monday, February 13, 2012

Exploring Cricut - It's So Sweet

Good Morning! Today is another challenge at Exploring Cricut The challenge this time is something sweet - can be anything using, candies, sweets, love, hearts, etc and not limited to Valentines.  Just make sure you have cricut cuts.


I chose to do a Valentine theme. Of course, this could be used for anniversary too or even a love note to someone special:)


Okay, so now it is your turn:) Can't wait to see what you guys create!

Recipe:
A2 card base
Heart and Key - Indie Art DCWV Papers
Top Note - Elegant Edges My Mind's Eye
Sentiment - My Creative Time
Black ink, pop dots, ribbon

Thanks for stopping by!

Annette


Thursday, February 9, 2012

Have A Heart

Good Morning! If you are needing a last minute treat holder Mary, from Cardz TV, has a really fast and easy one. Her video explains all the details and I just had to try too:)

I used score tape to attach the plastic bag on the inside with the treat and then hole punched threading ribbon through to keep it together.


Recipe:
White paper - 4 1/4" by 11" Scored at 1", 5" 7"
Hearts- Sweethearts 2 1/2", 2" 
Sizzix hearts and Cuttlebug Swiss Dots embossing folders
Pop Dots, ribbon, Score Tape, Plastic Bag

Entering:
Fantabulous Cricut Love is in the Air
Paper Playtime Hearts or Love Theme

Thanks for stopping by!

Annette

Tuesday, February 7, 2012

Pink Rose

Wow! Today really got away from me. Better late than never posting. I am very pleased with how this one turned out and wish you could see how sparkly it is in person. I used the Sweethearts cartridge. I popped the rose up and lifted the petals by rounding with a pencil.


Recipe:
A2 card base
Papers - Scraps and Authentique
Rose and leaves - Sweethearts 2.88"
Sentiment - My Creative Time
Stickles and iridescent loose glitter


Thanks for stopping by!

Annette

Monday, February 6, 2012

Valentine Love

Hello Everyone! I decided to play with some stamps that have been neglected. This girl is super cute and fun to embellish. I used markers and pencils as well as some stickles here and there. The stamps are from Stampin' Up and My Creative Time. Papers are all from DCWV boy stack.


I really need to pull these stamps out more often as they are really fun to play with. I hope you have a great rest of your day:)


Thanks for stopping by!

Annette

Friday, February 3, 2012

Elephant Valentine Treat Bags

Hi! I wanted to share another idea for treat bags. These are made with the Paisley cartridge. The "sweet" would be for girls and the "cool" would be for boys if you are giving for class Valentine treats. Hope you all have a great weekend! We are getting some much needed rain today and it is awesome:)

The "cool" and the "sweet" were first done with the Cricut marker and then cut out.


Recipe:
3 x 3 card base
Elephant - Paisley
Sentiment - Paisley
Cellophane bags - Michael's
Stickles, Cricut markers, ribbon

Entering:
Die Cuttin' Divas Anything Goes
DL. Art Anything Goes


Thanks for stopping by!

Annette

Thursday, February 2, 2012

Exploring Cricut Daily Project - Heart Wreath

Good Morning! It's my turn to share a project at Exploring Cricut. I am all about simple these days and I needed a Valentine wreath for my front door. I can't take credit for the idea as I have seen it all over blog land. I will say that I think I got mine done quicker with my trusty friend Cricut:)

I started by mapping on my Gypsy 3" circles with the 12 x 24 mat. I was able to get 21 circles cut at a time. I used the deep cut blade set at 6, Speed 2, Pressure 5. I also used multi-cut which was set to cut the image 2 times.

I chose not to use Heat 'N Bond on my project because my circles weren't going to be adhered flat to another object. Normally this product is a must so that it gives the felt stability while cutting. I cut a 12 x 24 piece of felt and laid it on the mat adhering it with blue painter's tape all the way around. It worked beautifully.


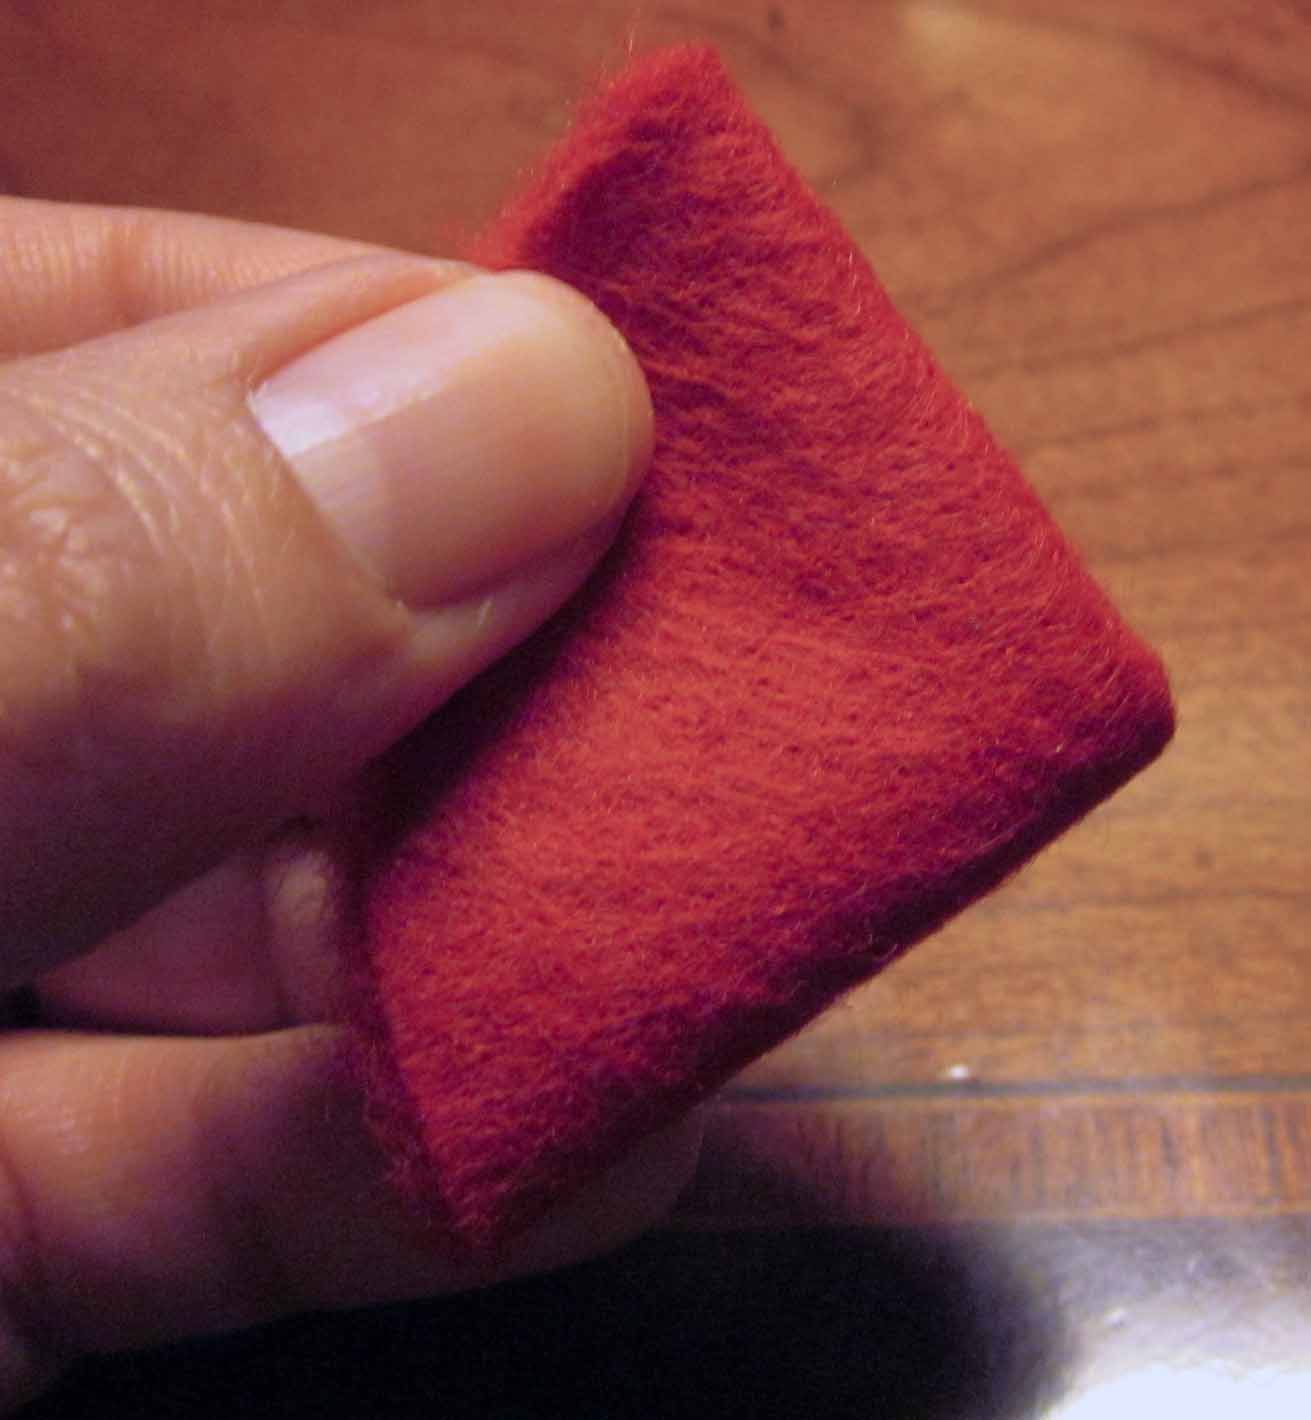
Once the circles were cut I then began to assemble my wreath. The circles were folded in half and then folded again.


A pin was placed in the corner of the felt and then pushed into the styrofoam wreath. You won't need to do the back of the wreath. Once I pinned the circle I opened it so that it looked fuller as I was going.


Recipe:
Styrofoam Heart - Joann Fabric
Felt - 3/4" yard off the bolt
Circles - George 3"
Seamstress pins, painter's tape
Ribbon of your choice 8" for back of wreath

Thanks for stopping by! Don't forget there is still time to enter the challenge at Exploring Cricut. You have until February 4th and I can't wait to see what you make:)

Annette

Wednesday, February 1, 2012

Valentine Treats

Good Morning! Are you all getting into the Valentine spirit? Today I have a cute little treat bag that came together in a snap. One of my favorite cartridges is Storybook. There are so many hidden gems on this cartridge and I always find just the right thing to use for it.

I am sad this year as I have no kiddos who need treat bags anymore. However, adults like a little treat too: so I'm thinking to whip up some for by Bible Babes:)


Recipe:
Top Note - Storybook 2.70"
Puppy - Sweethearts 1.37"
Papers - Bazzill
Bag - Michael's
Sentiment - My Pink Stamper
Googley eyes, black ink

Entering:
Cooking With Cricut  Child's Valentine using pink, white and red

Thanks for stopping by!
Annette

Tuesday, January 31, 2012

Valentine Topiary

Hi Everyone! Today I wanted to share a quick idea if you are needing some Valentine inspiration. There definitely is a lot to choose from out there. This took about an hour to make and I am thrilled with how it turned out.

I hot glued the cupcake liners to the styrofoam ball. I had my husband drill a small hole in the bottom of the ball to then glue the dowel rod in place. To keep the rod sturdy I glued some styrofoam in the bottom and pushed the rod through that as well.


Recipe:
Bucket - Target
Dowel Rod - changed the color to pink by running it through my pink Staz On
Styrofoam ball - Joann Fabrics
75 Cupcake Liners - Joann Fabrics
Ribbon, filler - stash

I hope I've inspired you to create some heart goodness:)

Thanks for stopping by!
Annette


Thursday, January 19, 2012

Exploring Cricut Daily Project - Lover's Lane

Good Morning Everyone! I'm so glad you stopped by as it is my turn to share with you a project for Exploring Cricut. I have a Valentine's layout for you and it was so much fun to do. I used quite a few carts to accomplish this one and a lot of stickles:) The name was chosen because my husband's hometown has a street called Lover's Lane and I have always thought it was a very pretty road to travel; perfect for a Valentine page.


Once I have decided on a theme I like to use my gypsy to map out the cuts so I can see how big everything needs to be. From that point, I will either make a tab for each item to cut or group by color. For this particular layout I chose to have a tab for each cut instead of color. I wanted to make sure that the cuts stayed together since there were so many pieces per item.

As you can see, I changed my final layout once I cut them out because I didn't like that the road was hidden. The border was welded together to fit the length of the 12 x 12 pages.


I really like the letters from Storybook. I haven't used this cut very often and it was helpful for me to have the booklet out so that I could make sure and get the right accent frame to go with each letter.


I used the white Signo pen on the wheels and then I added Glossy Accents to it as well as to her shoes, lights and Stickles on basket.


Glossy Accents was added to the cat's heart, the cat and dogs' black eyes and the dog's collar.


Recipe:
12 x 12 2 page layout
Papers - Crate Paper Farmhouse, Bo Bunny Crazy Love, DCWV, stash
Border - Elegant Edges 1.02"
Title - Storybook 1.31"
Apostrophe - Indie Art (actually a rain drop) .79"
Girl w/scooter - Sweethearts 3.45"
House - Everyday Pop Up Cards 3.15"
Heart chimney - Sweethearts 2.85"
Volkswagen car - Sweethearts 1.62"
Road - Paper Dolls for Everyday 2.69", Argyle Cuttlebug folder
Tree- Sweethearts 4.99"
Dog - Sweethearts 2.19"
Grass - Paper Dolls for Everyday 1"
Cat - Sweethearts 1.92"
Peachy Keen Critter faces
Stickles - Fruit Punch, Xmas Red, Stardust, Firefly, Cinnamon, Golden Rod
Liquid Pearls - White Opal and Pewter
Ribbon - Joann Fabric's
Prima flower, brown ink, pop dots, Glossy Accents, white signo pen, black micro pen


Thank you for stopping by! Don't forget to enter the challenge over at Exploring Cricut. We'd love to see what you create:)
Annette


Wednesday, January 18, 2012

Sweetheart!

Hi! I hope your day is going great! I had a chance to make a Valentine card and I have to say I experimented on this one with a couple different things. I wanted the candy to show through instead of rest on top of the image so I used vellum. But, as we all know vellum can be tricky to adhere to; so I used Stickles and then Glossy Accents to attach the candy to the vellum. Well, I couldn't leave well enough alone and I decided to adhere glossy accents to the outside of the vellum. I do like how it curled the vellum around just like a real gumball machine, but I don't like the crinkles I would have preferred a smoother look. If any of you have tried this I would be interested to hear how you kept it smooth. I am glad that I played around with it as I think it is still a fun card.

I also used paper that I received from Diana at D.L.Art (the black with silver). I think the texture is so pretty. The papers are made with silk and cotton and I am excited to play with the rest of the patterns:)


Recipe:
A2 size card base
Papers - Bazzill, American Craft, silk/cotton papers
Gumball - Sweethearts 3.75"
Sentiment - My Creative Time
Stickles - Xmas Red, Turquoise, Firefly, Tangerine, Thistle, Yellow
Liquid Pearls - Pewter
Ribbon - Stash
Glossy Accents

Entering:
Getty Cricky Link Up Love Party - a way to get to know each other and blog inspiration:)
Free Pretty Things for You - Whatever You Want Wednesday 
Whimsical Designs Anything Goes
A Muse Studio Love Is In the Air

Thank you for stopping by!
Annette


Friday, January 13, 2012

Valentine With Love!

Happy Friday Everyone! This is going to be a busy weekend around my house and I am hoping to be able to squeeze crafting in:)

Today I wanted to share a Valentine card that I made using the sketch from More than Favors. This was a fun one to do, but also a little tricky as the sketch is actually for a layout. I'm not sure about sizing, but I do really like the papers and especially the ruffle from Tim Holtz.


Recipe:
A2 size card
Papers - Authentique
Heart - Martha Stewart Elegant Cake Art 2.65"
Top Note - Elegant Edges 3.12"
Ribbon - Tim Holtz
Sentiment - Michaels
Crimper, Fiskars Punch

Entering:
More Than Favors Sketch Challenge #62
Hand Stamped Sentiments - Pleats or Ruffles Challenge #100

Thank you for stopping by!
Annette